
March 19, 2026
A Professional Guide to Trimming Your Dog’s Nails
Maintaining your canine companion’s physical health requires consistent attention to their grooming needs. While many pet owners focus on coat care and dental hygiene, proper paw maintenance is equally critical. Overgrown dog nails can alter your pet’s natural posture, leading to joint pain, skeletal damage, and reduced mobility. When you trim your dog’s nails regularly, you prevent these long-term structural issues and keep your dog comfortable during daily activities.
Many owners hesitate to perform this grooming task at home for fear of causing pain or bleeding. However, with the right tools, a clear understanding of canine anatomy, and proper techniques, you can manage your dog’s paws safely and effectively. Establishing a routine reduces stress for both you and your pet, making the process a standard part of their health regimen.
Gladiator K-Nine’s comprehensive guide provides step-by-step instructions, professional techniques, and essential safety measures to ensure a successful grooming experience. By following these protocols, you can confidently trim your dog’s nails and maintain their overall well-being.
Essential Gear for Proper Nail Maintenance
Before you begin, gather the necessary equipment. Using the correct tools ensures a clean cut and minimizes discomfort for your dog.
- Clippers: Choose between scissor-style or guillotine-style clippers based on your dog’s size. Scissor clippers are generally better for larger, thicker dog nails, while guillotine clippers work well for small to medium breeds. Ensure the blades are sharp; dull blades crush the nail, causing pain.
- Grinders: A rotary grinder (such as a Dremel) is an excellent alternative if your dog dislikes the pinching sensation of clippers. Grinders allow you to file the nail down gradually on a low setting.
- Safety Supplies: Always keep styptic powder or simple household cornstarch within reach. These powders act as clotting agents, quickly stopping bleeding in an accident.
- Treats: High-value rewards are necessary for positive reinforcement during and after the procedure.
Understanding Canine Nail Anatomy
The most critical aspect of nail trimming is identifying the “quick.” The quick is the highly sensitive inner part of the nail containing blood vessels and nerves. Cutting into the quick causes sharp pain and bleeding.
For dogs with light or translucent dog nails, the quick is easily visible as a pinkish vein running through the center of the nail. You simply need to cut below this pink area.
Dark dog nails present a greater challenge because the quick is hidden. To safely trim dark nails, cut very small amounts at a time. After each cut, examine the cross-section of the nail. As you approach the quick, a small dark, fleshy spot will appear in the center of the cut surface. Once you see this dot, stop cutting immediately.
Step-by-Step Trimming Guide
Follow these structured steps to ensure a safe and efficient trimming session.
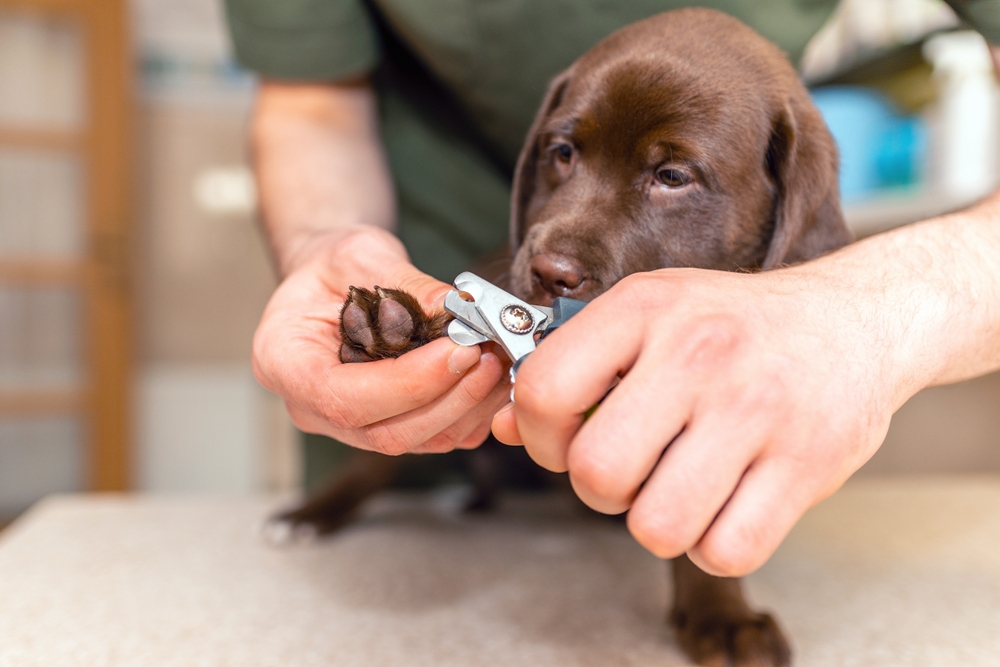
1. Secure the Paw
Position your dog in a comfortable, well-lit area. Hold the paw firmly but gently. Some professionals recommend holding the paw backward, similar to a farrier shoeing a horse, as this provides a clearer view of the underside of the nail and prevents the dog from pulling away forcefully.
2. Set the Angle
Place the clippers at a 45-degree angle, cutting from underneath the nail rather than top-down. This angle follows the natural curve of the nail and reduces the risk of pinching the quick.
3. Make the Cut
Remove only 1 to 2 millimeters of the nail at a time. Make a quick, decisive squeeze. Hesitation can lead to twisting the nail, which causes discomfort.
4. Check the Dewclaws
Do not forget the dewclaws, which are located higher up on the inner side of the front (and sometimes hind) legs. Because these nails do not touch the ground, they do not wear down naturally and can curl back into the skin if left untrimmed.
Proven Calming Techniques
Anxiety is a common obstacle when trying to trim your dog’s nails. Managing your dog’s stress is just as important as the physical cut. Start by acclimating your dog to having their paws handled long before you introduce the clippers.
Maintain a calm, authoritative demeanor. Dogs easily pick up on their owner’s nervousness. If your dog becomes highly agitated, take a break and try again later. For dogs that suffer from severe anxiety during grooming, specialized equipment can provide significant relief.
We highly recommend equipping your pet with the Gladiator K-Nine far infrared collar. This advanced collar promotes relaxation and helps keep your dog calm, transforming a stressful grooming session into a manageable, peaceful routine.
Troubleshooting Common Issues
Even experienced groomers occasionally cut a nail too short. If you accidentally nick the quick, do not panic. Apply a pinch of styptic powder or cornstarch directly to the bleeding tip and hold firm pressure for at least two minutes. The bleeding will subside rapidly.
If your dog absolutely refuses to tolerate clippers, pivot to a nail grinder. Grinders produce a vibration that some dogs find less threatening than the pressure of clippers. Introduce the sound of the grinder gradually, rewarding your dog for remaining calm near the device before applying it to your dog’s nails. If you remain uncomfortable performing this task, do not hesitate to seek professional help from a veterinarian or certified groomer.
Reinforcing Positive Behavior for Future Success
The ultimate goal is to make nail trimming a routine, stress-free event. Consistency and positive reinforcement are your best tools for long-term success. Reward your dog with high-value treats immediately after each paw, or even after each nail if they are particularly nervous.
Trim your dog’s nails monthly. Regular maintenance naturally forces the quick to recede, making future trims easier and safer. By maintaining a calm environment, using the right tools like the Gladiator K-Nine far infrared collar, and practicing proper technique, you ensure your dog remains healthy, mobile, and comfortable.